As a marketer, one of the most important roles you need to play is being able to identify the right audience for your website or your client’s. You need to make sure that, whatever paid to advertise you are going to do, should be effective and your marketing efforts should reach the appropriate audience(could be prospective clients), that also, taking care of the cost-effectiveness. Identifying new channels regularly and testing out audiences is part and parcel of the job. Of Course, the big players(Google and Facebook) are always there, but due to high competition on those, you need to look out for new ways to justify advertising efforts.
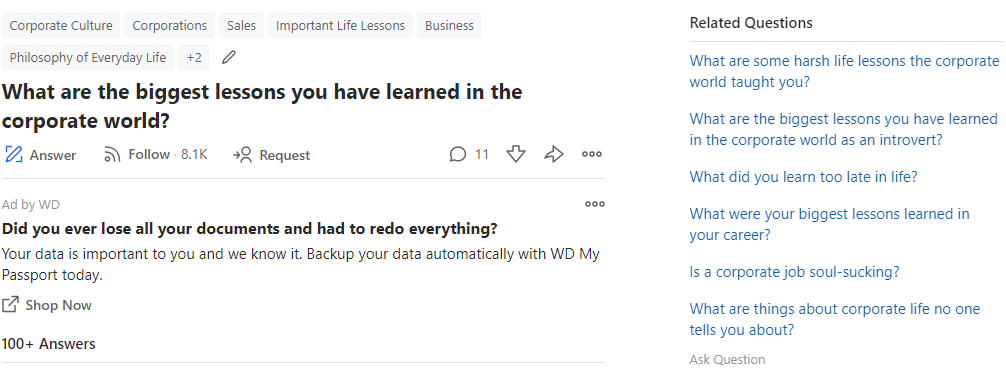
Out of the many channels which you can use, “Quora Ads” is one of the top contenders. “Quora” has more than 400 million unique visitors every month and continuously getting popular among users for intent based queries. It’s an Q and A based platform where users can ask any type of questions and can get reliable information from other Quora users. People ask lots of variety of questions on the platform and get diverse answers for one such question from other people.
Page Contents
WHY YOU SHOULD USE QUORA ADS?
There are multiple reasons for including Quora Ads in your media strategy. Here are some :
- Vast extended Audience:- The platform has currently an extensive base of qualified users who are asking relevant questions around various topics and getting answers which are explained thoroughly and to the point. These users are having some level of experience in their respective fields or around the topic and they try to help others by sharing their experiences.
- Multiple Targeting Options:- If you are looking for precise targeting and to reach specific users, this is the right platform for you. Quora provides Contextual Targeting, Interest-based Targeting, Behavioral Targeting, Topic Targeting options. These powerful targeting will certainly help you to segment and narrow down to a specialized audience group.
- Highly Intended Audience:- The users in the platform are highly intended as these users came by directly looking for some specific answers for their queries and since most of the answers come from authentic experienced members of Quora, the trust factor is always there among the users. Advertisers can utilize this valuable trust in their favor by providing relevant information to the query which users are having and gain the trust of users for their brand as well.
- Native Ad Experience:- Ad Formats are very effective and user friendly as it matches with the content of the platform. Therefore, it helps to get high CTRs(Click Through Rate) and boost conversions.
HOW DOES IT WORKS?
Quora is centered around Topics on which users ask questions and provide answers. You can target users based on the Topics, Interest, previously identified audiences(first party data) or broad targeting and set up your campaign as per your objective. Once that is decided then you have to create an ad set, set your ad format and Volla !! . You have done the setup for your first campaign on quora. The ad manager is simple to use and self-explanatory. You will not find much difficulty in identifying what is where and can easily structure your campaign accordingly. Of Course, there are many best practices which you can utilize to enhance the effectiveness of campaigns and get good performance. This is explained in detail in the later section of the article and additionally I have added a few tips to make sure you get most out of your Campaign.
Let’s Start from the Start :
CREATING AD ACCOUNT ON QUORA ADS
To Create an Quora Ads account simply go to the page https://www.quora.com/business .
Once you open that link you will be taken to the below page:
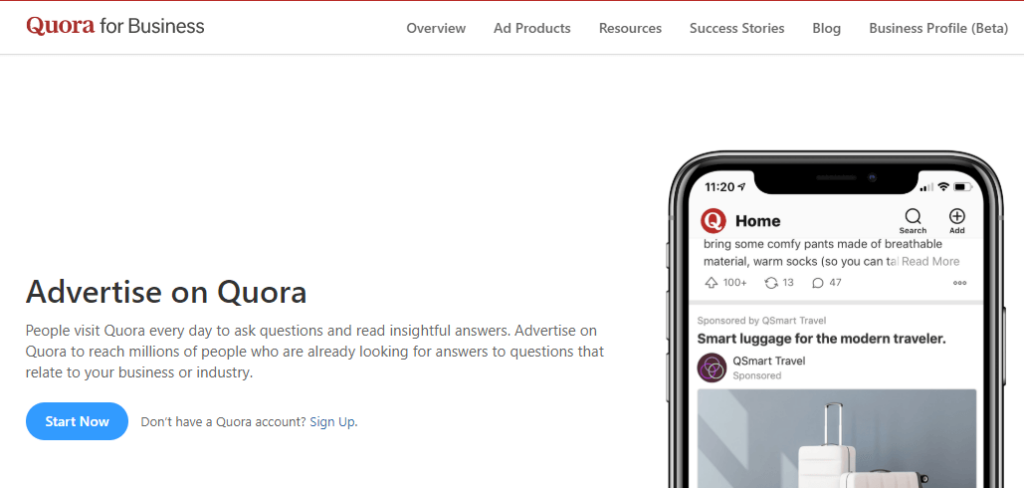
Now Click to Button (START NOW) to move further. There you will be asked to “Create an Ad Account” : https://www.quora.com/ads/create_account
Provide the Ad Account Name and Contact Email with which your ad account will be linked.
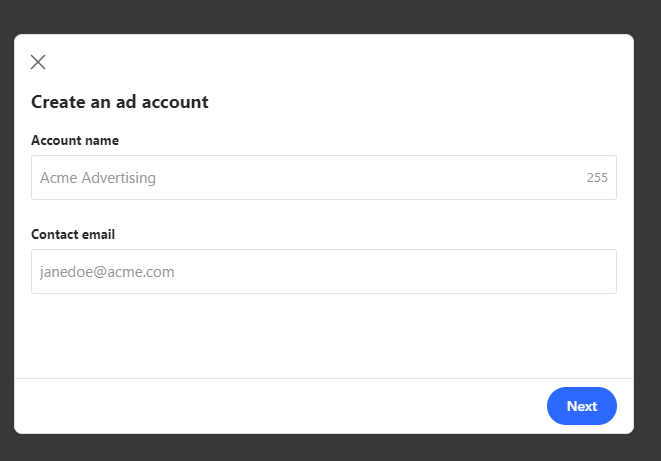
Once you click on (NEXT), you will be asked to provide further details about your Business, like Business Name, Billing Country, Website etc. Once you fill in the respective details, click on (START ADVERTISING).
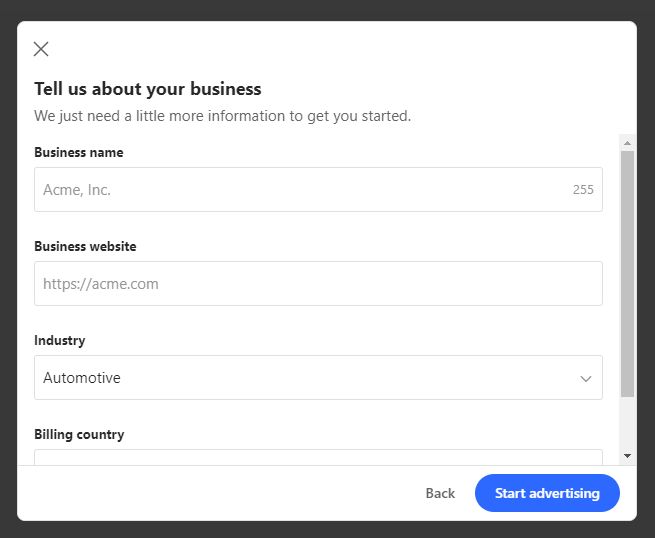
That’s It. You are done with Creating your Quora Ad Account. Now you will be sent to the Dashboard. But, before doing anything, it is required to validate your email id.
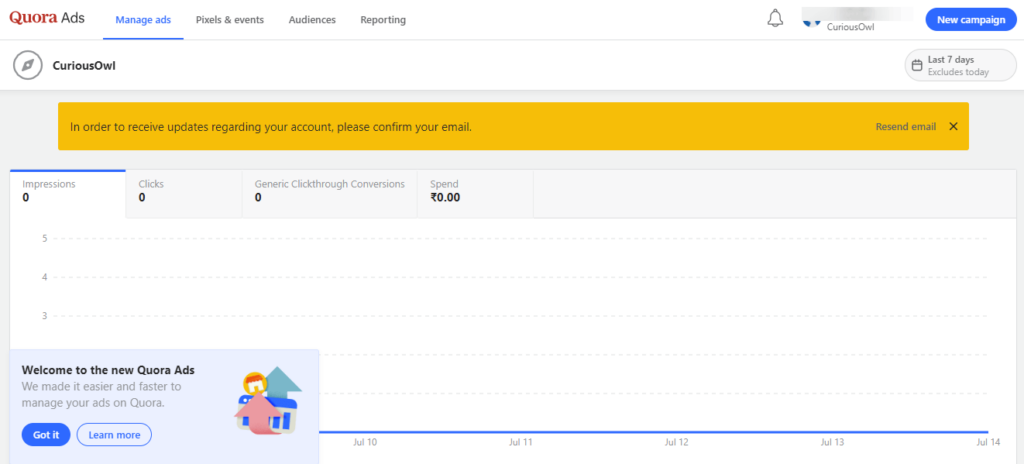
The interface designed is user friendly and simple to use.
SETTING UP CAMPAIGN
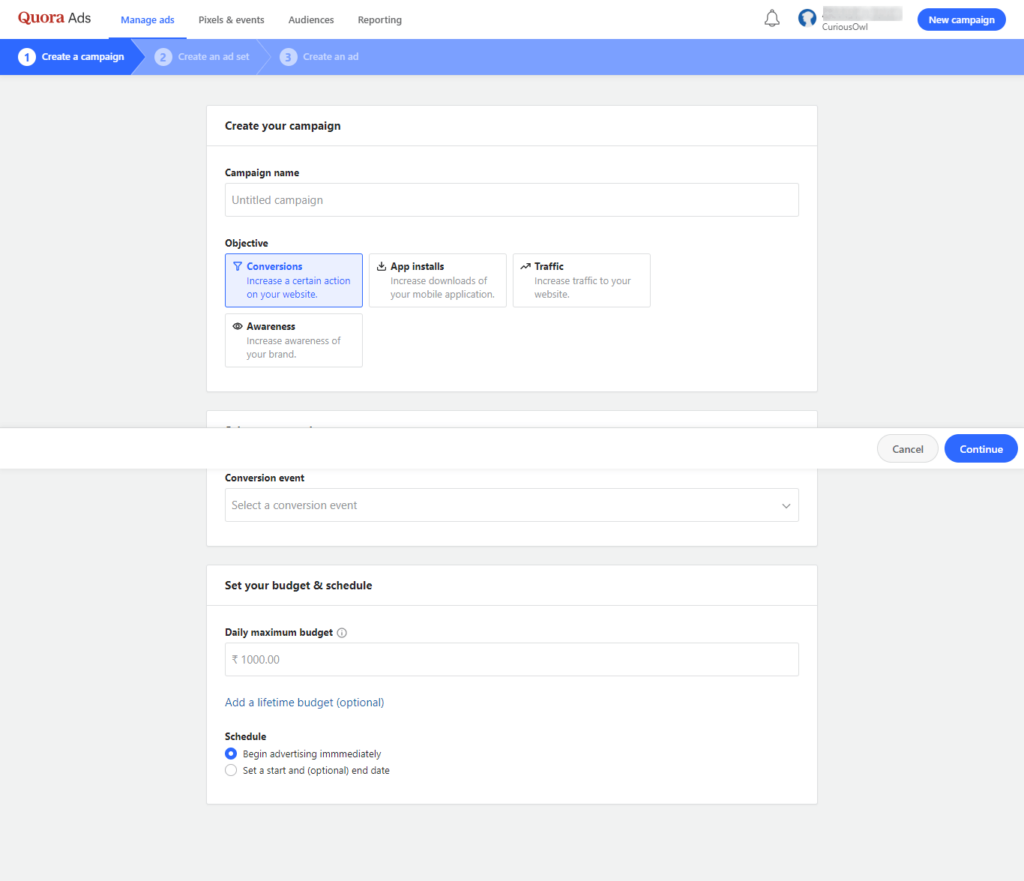
To Create a new Campaign, simply click on the (NEW CAMPAIGN) button on the top right corner of the dashboard. After that, you need to provide some details to get started with the Campaign setup. Enter the Campaign Name. It’s always good to follow a naming convention for the campaign so that it becomes easier to know from the name itself about some basic information about the campaign. Next step is to provide the Campaign Objective. There are four objectives available here:
- Conversions: For tracking conversions or leads from the website/landing page.
- App Installs: For downloads of your Mobile App.
- Traffic: For bringing more visitors to your website.
- Awareness: To get traction for your Brand. And making is visible in front of the right audience.
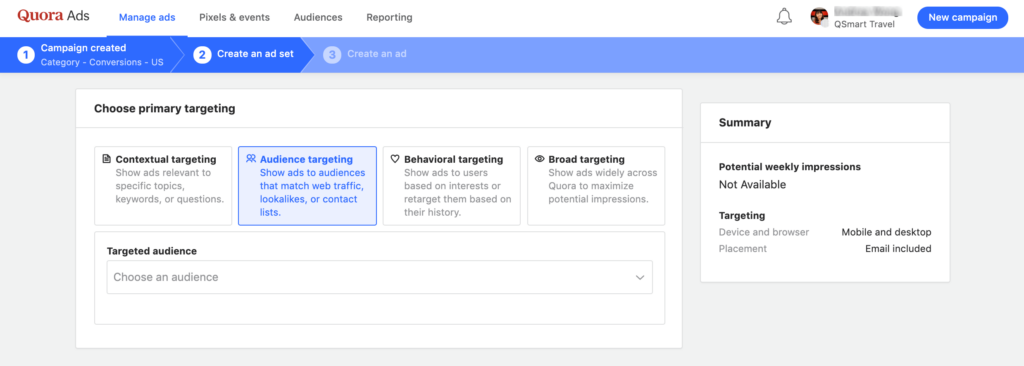
TARGETING OPTIONS AVAILABLE ON QUORA
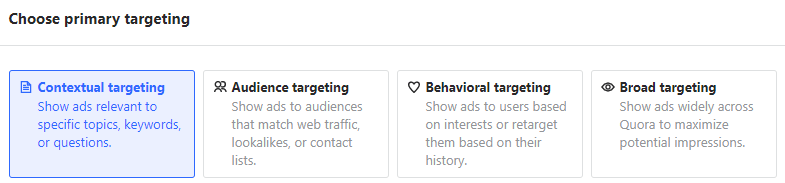
There are 4 targeting options available on the platform.
- Contextual Targeting:- If you want to target users based on keywords, topics or specific questions, then you can go with this type of targeting. This type of targeting can be very discrete and effective, as it allows you to identify users who are having direct intent of getting any particular information or solution to their queries.
- Audience Targeting: Mainly refers to targeting First-Party data, which you already have. Could be from your website traffic segments or from your email database. In quora, you have 3 choices.
- Website Traffic: This will be used to target the audience from your website. They can be any visitors going to a specific page (like users of any Jewellery website going to Diamond rings section) or users doing any event (like adding products to Cart).
- Lookalike: Target users who are similar to your previously identified audience group or segment. This segment is created based on an existing audience and can be targeted to reach broader audiences who are identical to your existing audience.
- List Match: If you have an existing list of users(an email list) you can upload those email id lists and target them.
3. Behavioral Targeting: Use this if you want to show your ads to user based on their
Interest or affinity, which they have shown previously for any topics or
products/services. You can also retarget the users who are visiting the website. It works based on Website Cookie data or Mobile device data, based on which a user’s interests are identified. This can help you create very personalized messages and improve the overall user ad experience.
4. Broad Targeting: If you want to reach out to a large audience base, then this targeting is best for you. If you are trying to scale things up, then this type of targeting will help to reach out to new audiences.
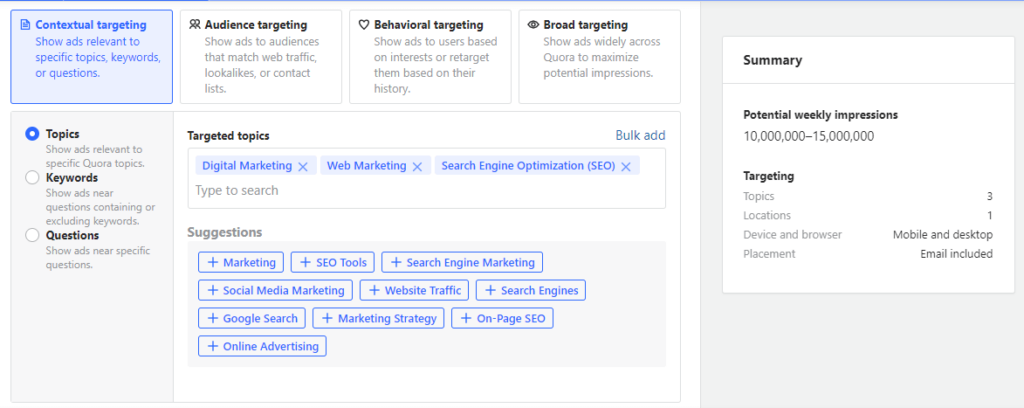
One good thing about Quora Ads platform is that it provides a summary of potential weekly impressions which you can get for the type of targeting you are selecting and further selecting any topics or keywords. It will give you an idea of what kind of potential reach your ad can get after taking the campaign live.
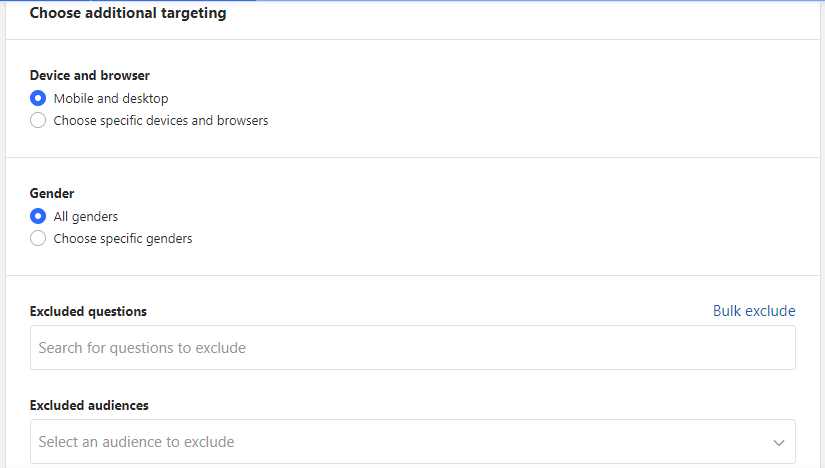
Apart from all these targeting alternatives, you can also choose to select additional targeting such as device or browser, gender, exclude questions or audiences, email list etc.
Once all the targeting settings are complete, you need to set the bid for your ad campaign. This is the maximum price you are willing to pay either for click or for CPM(Cost per thousand impressions).You can select the ad delivery optimization either for maximizing clicks or for getting maximum number of impressions.
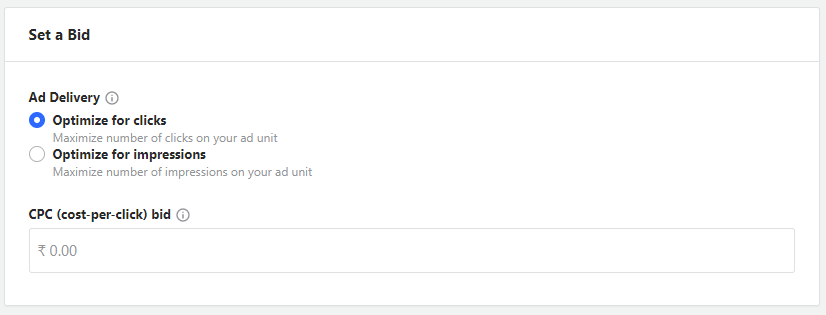
Click (CONTINUE) after setting the bid.
TYPES OF AD FORMATS
There are 3 types of Ad Formats available in the platform.
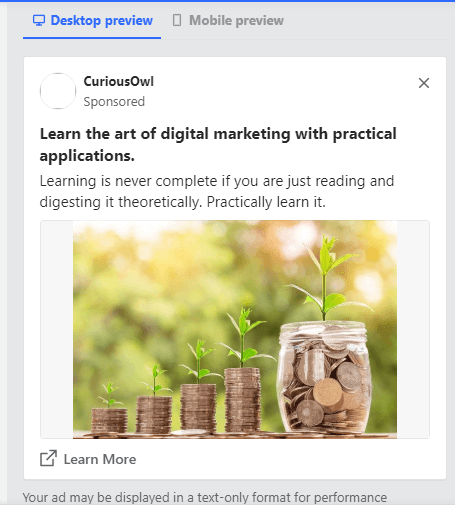
- Image Ads: In this format, you need to use an image with your ad, which will be shown along with the text and your company logo. This format is good to grab users’ attention visually with an attractive image. The aspect ratio of the Image should be 16:9 and the recommended image size should be 600 x 335 pixels.
- Text Ads: As the name suggests, the ad will only have text in it. This type of ad has quite a good impact if you want to do contextual ads and keep it simple.
- Promote an Answer: To keep your sponsored ad more relatable to users, you can post an answer for any specific question and promote that answer itself. Here you just need to put a Business Name and the answer URL as a creative and you are good to go. To identify the answer URL, just right click on the text that says Answered beneath and select copy link address.
Common things that you need to provide in Image and Text ads are Headline Sentence(max 80 characters), body text(max 105 characters), Business Name and logo of the company. The company logo will be reviewed by the quora ad quality verification team and approved. Images and logo should be as per Ad Image Policy. Your logo should be approved by their internal team, in order to move ahead with your setup completion.
Click (CONTINUE)
SETTING UP PAYMENT METHOD
Now, you have to set up the payment method. There are two ways to do so.
- You can directly set up while creating your ads. By clicking on the Message.

2. Or you can go to your profile image at top right corner and select payment settings from there.

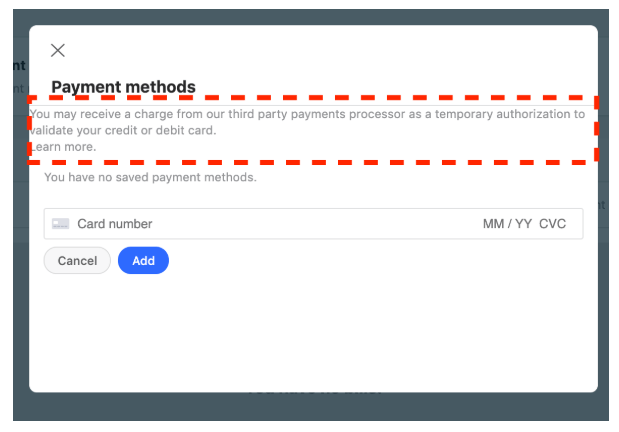
There are only two payment methods available in the platform. Credit Card and Debit Card payments. Paypal, Cryptocurrencies, Paypal, Wire Transfers and Credits are not yet available.You can add your Credit/Debit Card details. They will deduct approximately 10 USD for temporary authorization to validate your Card. They will immediately invalidate this charge once the card is validated, so you will get the money back within a week or so.
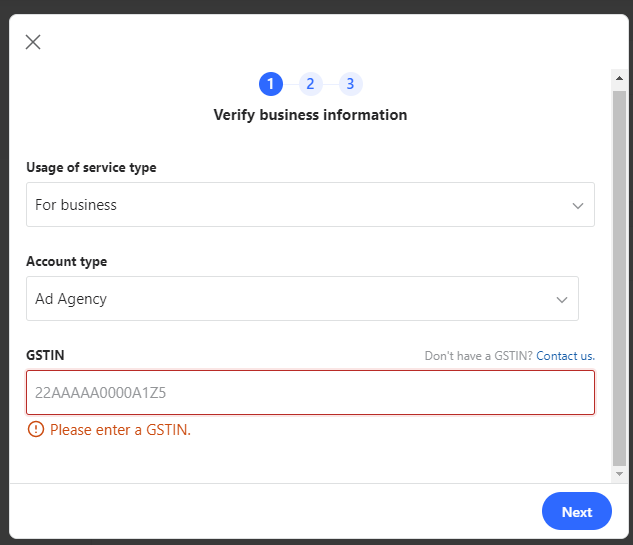
But before adding your Card details, you need to verify your business information and address. It’s important to add your Company’s Tax Id to verify your company. If you do not have the Company’s Tax ID. You can submit an application here : https://quoraadsupport.zendesk.com/hc/en-us/requests/new
Once you have completed your Business validation and adding card details. You are good to go from there and you will be able to complete your campaign setup. It might take some time to get you Campaign creatives quality verified by their internal audit team. Once that is done our campaigns will be set live.
REPORTING & MEASUREMENT
After completion of the Campaign, once it goes live. You will be able to see the overall impressions, clicks, spends, etc at the Dashboard itself. And also, you will be able to see the numbers for each campaign. The following are the metrics, which you can see in the platform.
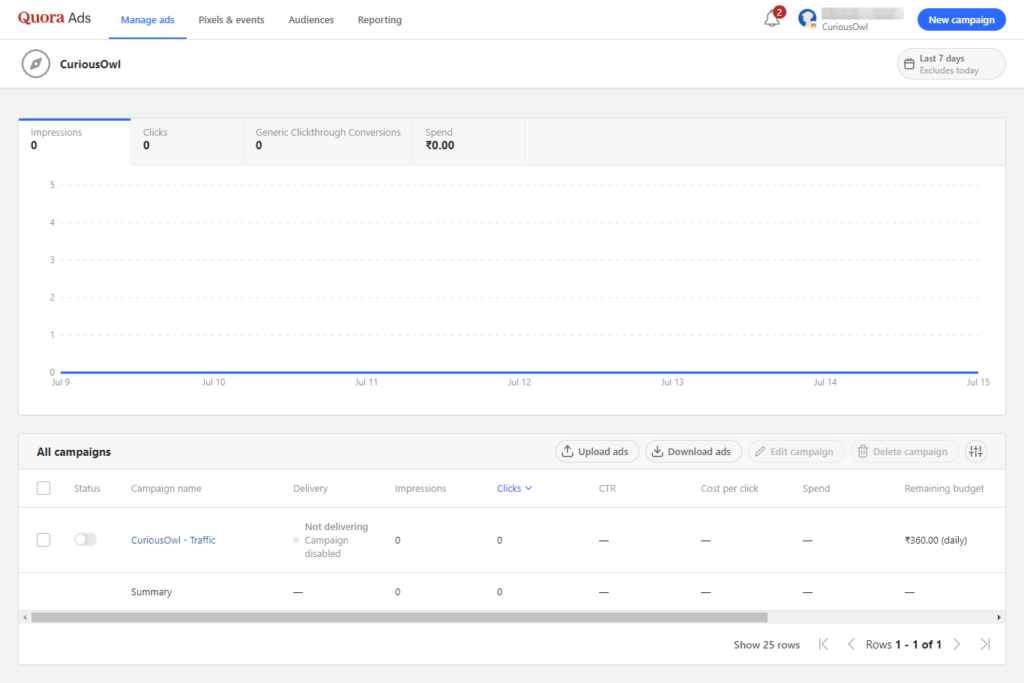
Campaign Name | Delivery | Impressions | Clicks | CTR | Cost Per Click | Spend | Remaining Budget | Upvotes | Comments | Shares
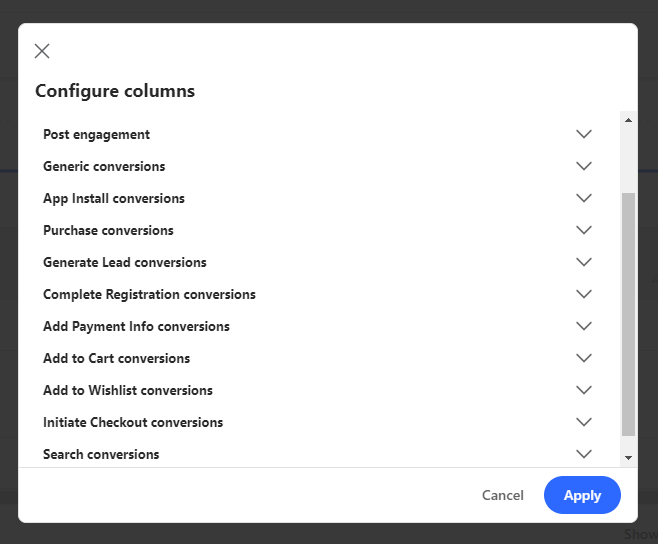
You can configure columns based on your requirement. You can drill down your campaign, by clicking on the Campaign Name till Ad level. One of the important factors for doing effective optimization is through reporting, with which you can know, what is happening where at a granular level.
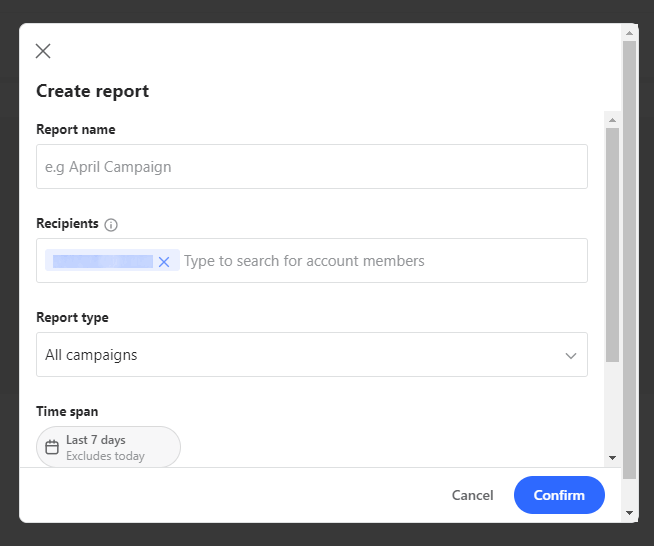
For a couple of campaigns, reports on the dashboard will be enough, but if you want to work on many campaigns, then it’s appropriate to export the data from (REPORTING) tab. At first, you need to create the report. Where you have to add Report Name, Recipients, Report Type(All Campaigns, Ad, Ad Set), Timespan, and Frequency.
Once the report is created it will show up under the Reporting Tab.
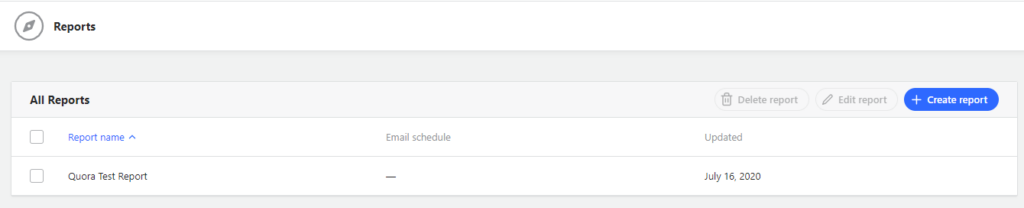
You will receive the report in your email. And you can download the report from there. The report will have all the metrics available in the platform, based on the report type you have selected.
CREATING CUSTOM AUDIENCES
Nowadays, Creating audience segments has become one of the most crucial parts of doing optimization, understanding your customers, and targeting the right ads to the right audiences. The more segmented your audience, the more powerful it becomes. You will get a higher CTR and Conversion Rate for the ads which are targeted appropriately to these audience groups.
In Quora Ads, you can create these audiences in three different ways.
- Website Traffic Audiences: These audiences are first-party, they are coming to your website via different channels(direct, social, search or any other way). These are the prospective audiences and if they are utilized well, they can be your long term customers. These audiences are based on the traffic of your website, which you can target or re-target and inform them with right ads and consecutively make them your customers.
- List Match Audience: These customized audiences can be created based on the Email List, of your existing customers, lead prospects or newsletter subscribers.You can either include or exclude this list of audiences in your campaigns.
- Lookalike Audience: If you want to reach to more potential audiences which are similar to your current audience, then you can create the LookAlike audience of your existing audience and target them on your campaigns. Rather than just doing broad targeting, these audience groups are having more chances of being high-value customers.
Let’s Look at how we set up the Audience Targeting in detail:-
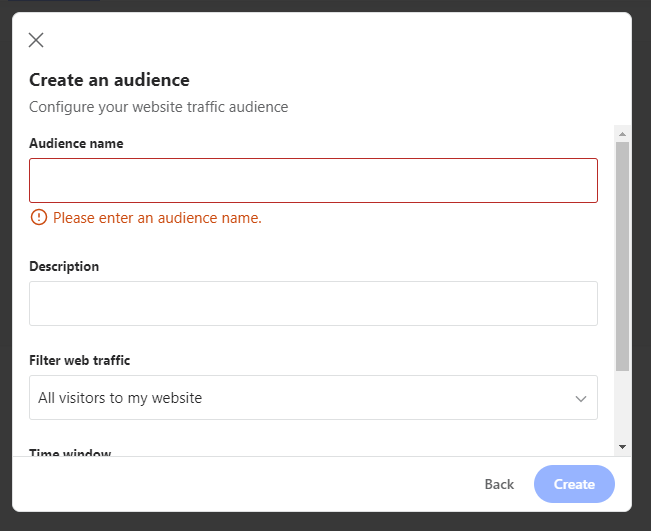
- Website Traffic Audience :- Add the audience name, description, filter your web traffic and Time Window for your audience segment. Under Filter web traffic, you are having the following options –
- All Visitors to my website.
- Visitors to specific pages of my website. (Ex – Users who are visiting only shoe pages)
- Visitors to specific but not all pages of my website. (Ex. Users who are visiting product pages, but not adding the products to Cart).
- From a Conversion or event. (Ex. The user who has already purchased)
- Custom. (If you want to create a specific rule by combining certain events on any specific page. etc) then you can use this choice.
Under any choice, you can select the time window based on the relevancy of the audience. The maximum Time window you can select is 180 days. And it may take up to 24 hours for calculating the size and showing up in the Audience tab.
You will be able to see your created Audience list, in Audience Tab.

NOTE : You need to setup the Quora Pixel in Pixel & Events tab and get the pixel placed on all pages of your website. Without implementing this, you will not be able to gather any data for audiences created.
2. List Match Audience: Goto Audiences -> “Create Audience” -> List Match. Same like Website Traffic Audience you need to add the Audience name, description to it.
Apart from that, you need the Hashing information( Hashing is used to secure your customer data. It will be done locally on your computer before uploading it on Quora’s server. It basically converts our customer file into a set of random characters that can be reversed back into its original form). This is done using a method known as SHA256.
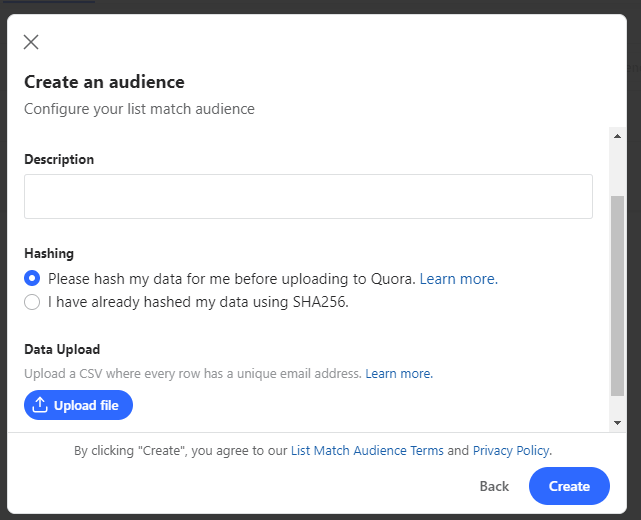
Once this is done, then you simply need to upload the CSV file with a unique email address in each row. If you upload it as plain-text, it will automatically be converted and hashed using the SHA256 algorithm in the browser. Approximately, it will take around 24 hours to get the data updated. Minimum audience size should be 200 and maximum upto 4 million.
3. Lookalike Audience: Before creating this, make sure that you already have any Website traffic audience or List match audience created. Then Go to, Audience tab -> Create Audience -> Select “Lookalike Audience”.Fill the Audience Name, Description, and select the Audience(This will be the source audience). Then select the Target Size. (You need to enter the percentage starting from 1% to 10% indicating how similar or broad you want your new audience to be) where 1% being the most similar and 10% is a very broad audience.
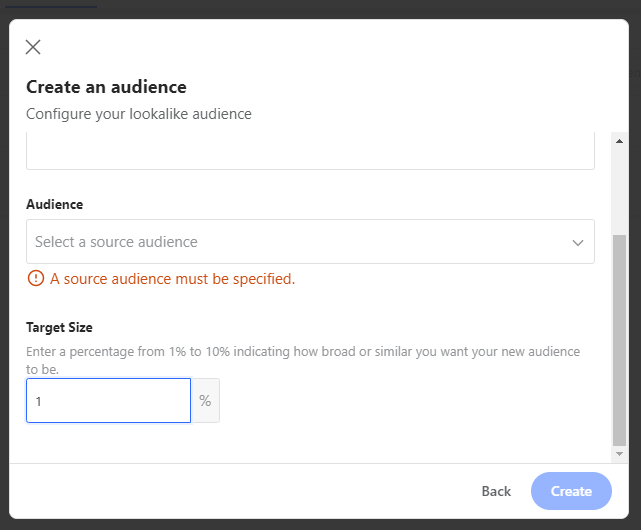
Again, it will take upto 24 hours to calculate the audience size. It will appear as the “Potential Impressions” metric. Your Source Audience must have at least 3,000 people in it for Website Traffic Audience and at least 500 people for List Match Audience.
As an optimization tactic, you can create audience segments with different percentages and test out what is working best for you. Of Course you might say, having 1% will be best effective, which is true but it will limit your audience size and scaling will be a challenge here. Same way if you target an audience with 10% your audience reach will be very high but performance results will be low. That’s why at the initial stage, it’s best to try out different audience groups and see which size fits best for you.
PIXELS & EVENT THAT CAN BE CREATED ON QUORA ADS MANAGER
Pixels are nothing but the set of code which needs to be implemented on the website code for tracking traffic, events, conversions etc. It helps in identifying how many people are visiting the website or what action they are taking on the website. For ex – Visiting any specific pages or adding products to add to cart. With pixels implemented, you get better insights about your audience and with that you can reach out to the right audience using better personalized ads.
In Quora Ads, the pixel includes two parts:
- The Base Pixel code 2) The Event Pixel code
The Base Pixel Code needs to be implemented in the header section on all the pages of your website. This pixel is helpful in building website audience for Traffic Targeting, Remarketing or Lookalike Targeting.
The Event Pixel Code is required to track specific events which are happening on the website(Ex. Conversion or Add To Cart Event). If some users have done any purchases or filled a form of some sort, then this pixel gets fired, indicating there is a conversion happening. This pixel is usually placed on the Thank You/Confirmation page of the website. The Event pixel needs to be placed on the <body> section. The pixel can be placed directly on the website or can be placed via any Third Party Tag management system(Ex. Google Tag Manager) Event Pixel implementations are completely dependent on use case basis. It’s not mandated to get them added to the website.
It’s always better to implement both the pixels on the website, as it will help to track the majority of events and metrics available on the Quora Ad manager. And using that you will be able to take better decisions to optimize your campaigns. Overall, it will help you to reach your goals more effectively and help you achieve better ROI for your Ad spends.
Setting up Pixels on Quora :
Navigate To the Pixel & Events -> Click on (SETUP PIXEL) -> Under the Install the Quora Pixel dialog box, you will have two options
1. Install manually :This is adding pixels directly on your website.
2. Install with a partner : Adding pixels using any third party platform like Google Tag Manager.
I like to implement it using GTM(Google Tag Manager). But you are free to choose whatever is comfortable to you. I will explain both ways here :
- Install Manually : Remember, we need to implement two parts of the pixel.
- Base Pixel Code: Which needs to be placed on all the pages of the website.
- Event Pixel Code : Which is required to track all the events happening on the website.
Follow these steps to implement the base pixel. After selecting the Install manually option in the Install the Quora pixel dialog box, click (NEXT). Here you will get two choices. Either you can place the Javascript Pixel(which is usually recommended) or Image pixel. Step 1. Copy your pixel and put it in a separate notepad, then click on (NEXT).
Additionally you can place the Advanced Match which is optional( Advanced match are used if the conversions or events cannot be tracked using Cookies.) Quora Pixel using Cookies matches all the website visitors and the events(like conversions) done by them. In many cases, the events cannot be tracked in an environment where cookies don’t work. Implementation and usage of Advanced Match is a whole different section altogether. I will explain the same in another article.
Step 2: Then you need to copy the code for “Event”.Choose the event that matches your campaign objective. Following are the events which are available –
Generic | Purchase | Generate Lead | Complete Registration | Add Payment Info | Add To Cart | Add To WishList | Initiate Checkout |Search .
For any given Event, you will be presented with two parts of the code.
1. For Page Load events – copy this code and implement it just below the base pixel code.
2. For inline action events – This is the main pixel that is required to track the respective action on an event handler like an onClick method in Javascript. Copy and paste the code in one such event handler.
For example, you want to track the conversions which are happening on the website. For that you need to place the Page Load Event code just below the base pixel code. And put the inline action event code on the Thankyou/Confirmation page. Or if you want to track the event on any button click, then you can also place the inline action code in an event handler.
Once implementation is completed correctly, then you can get access to a variety of features in the platform such as Performance and Conversion Data, Multi-Event Conversion Tracking, Mobile App Installs, Conversion Optimized Bidding and Audience Targeting. These are the advanced features, which you can utilize to get optimum results.
After the implementation, it’s required to verify whether the pixel is implemented correctly and working perfectly fine. You can check on the Pixel & Events tab. There it will show the number of times the base pixel and event pixel were fired in the last 15 minutes. In case, the pixel status is showing as “inactive” and there are no conversions recorded in the last 15 minutes, you can try to do a test conversion manually.
NOTE: It’s important that you don’t alter the code, as it will not function after that.
- Go to the page on which you have added the conversion event code and do a text conversion. And wait for approximately 2 minutes before checking the event on the Pixel & Event dashboard.
2. Install with a Partner: Here I will be explaining setting up pixels using Google Tag Manager. You can use any Tag Same like how you implement the pixel manually you have to add both parts of the pixel. The Base pixel and the event pixel.
- Go to Pixel & Events and click on the (SETUP PIXEL) and select “Install with a Partner”. You will see your unique pixel id. Copy that to your clipboard and keep it ready to be placed on your GTM. In Available partners, as you can see in the image below. Google Tag Manager is there.
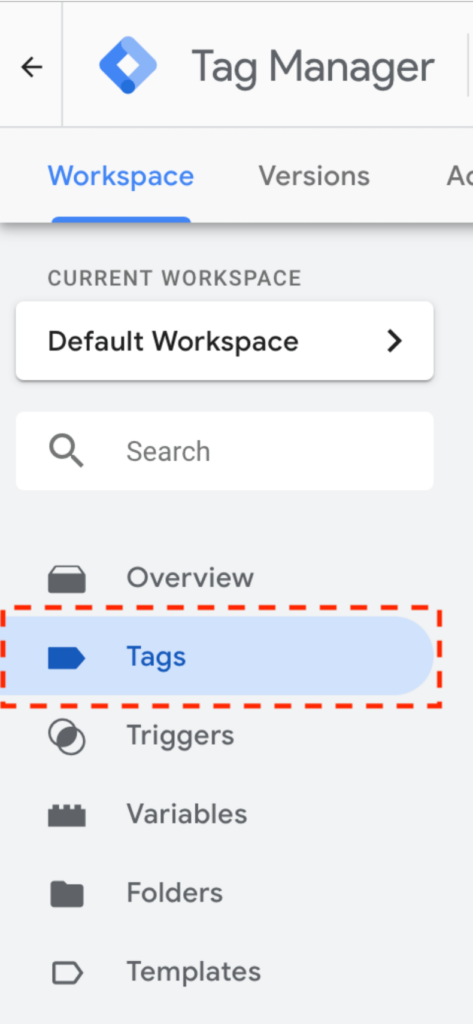
- Go to your Google Tag Manager account. In that, select “Tags”, then “New”. After that, select “Tag Configuration” . Once that is done, search for Quora Pixel.
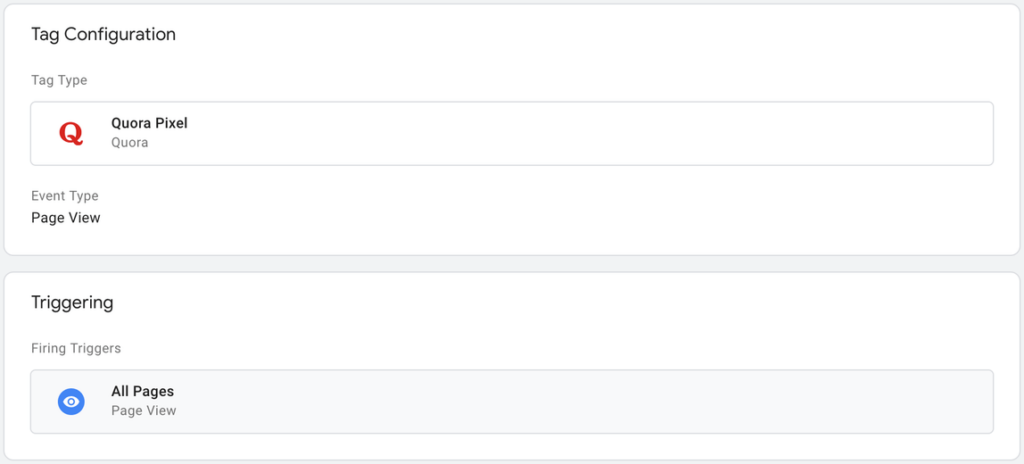
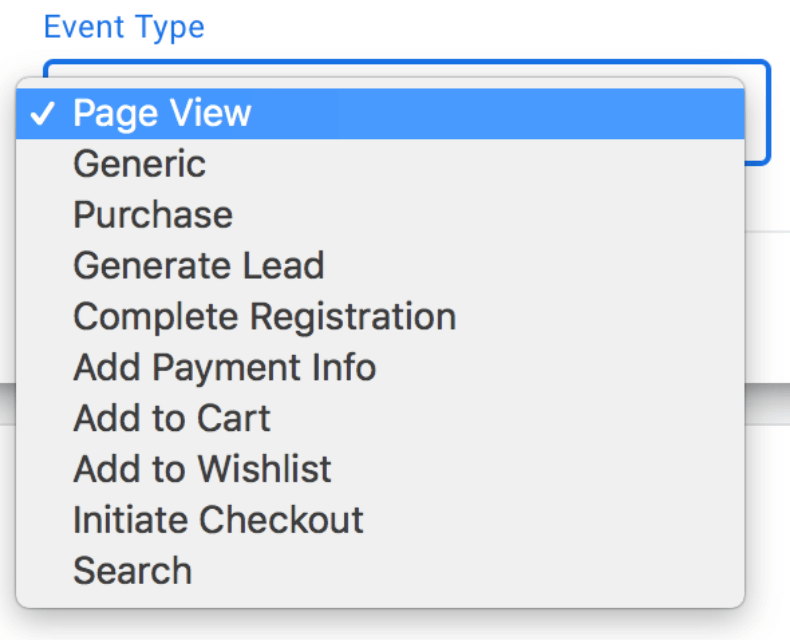
- Now, you just need to place your copied Quora pixel Id into the field labeled “Quora Pixel Id” and select “Page View” as the Event type, it will act as a base pixel for all the pages of your website.
- Once, the Page View is selected, choose the “Triggering” as “All Pages”.Usually, you will find this trigger as a default option there.
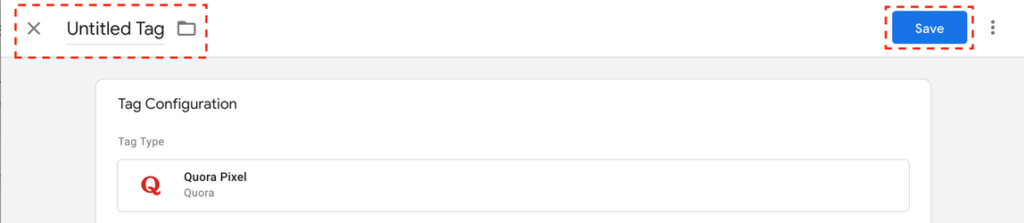
- Last step is to give the name of the “Tag” at the top left corner of the page and click “Save”.
Installing Event Pixel
After installing the base pixel, now you can place any event pixel (such as conversion pixel) in order to track any specific action performed by the user. It will help us to understand the activity on websites in a better way and optimize the Campaigns effectively. One thing to note here is that, Base pixel implementation before adding Event pixel is important. Without it, you will not be able to track the Events.
By default, there are nine standard events available.
Generic | Purchase | Generate Lead | Complete Registration | Add Payment Info | Add To Cart | Add To Wishlist | Initiate Checkout | Search
- Choose the “Triggering” and choose the option that fires your tag for the respective event. For example, if you chose “Generate Lead,” then select the trigger for when you are capturing a lead on your website.
- Add the name of your tag and click “Save”. The same steps can be repeated by adding any additional event.
- For Checking the Quora Pixel, whether it’s working correctly or not, follow the same steps, that are explained above for installing the pixel manually.
- You can also set up the “Custom Event”. If you need any specific action, that needs to be tracked.
CONCLUSION
With 400+ million visitors every month and consistently growing, Quora is definitely becoming a strong contender of providing quality inventory with a large audience base. The interface is very intuitive and simple, yet powerful enough to create scalable Campaigns for your business. Integration with various third party reporting tools and mobile measurement platforms, helps any marketer to get better insights about your campaign delivery and make optimization very effective. As a best practice, you should structure your campaigns appropriately, set right naming conventions for your Campaigns, Ad sets and Ads. Being consistent with Testing and Optimization everything will lead to better ROI.
If any further information is required for your ad campaign or stuck with an issue, you can check out the help center page adshelp.quora.com